ScriptingBasics
Scripting Basics
The Editor lets you create scenes ranging from simple to more complex worlds. Even without scripts, you can do a lot—but the true power of the Editor shows once you add at least some basic behavior to your scene.
In Engu, we use visual scripting. That means instead of writing code, you assemble colorful “tiles” into logical blocks. You don’t need to know programming—just understand the basic principles.
In this chapter, we will show them using simple examples.
ℹ️ TOPICS
ℹ️ INFORMATION
Visual scripting is used by multiple tools and game engines. The basics you learn in Engu can also be applied in other applications.
Testing scene
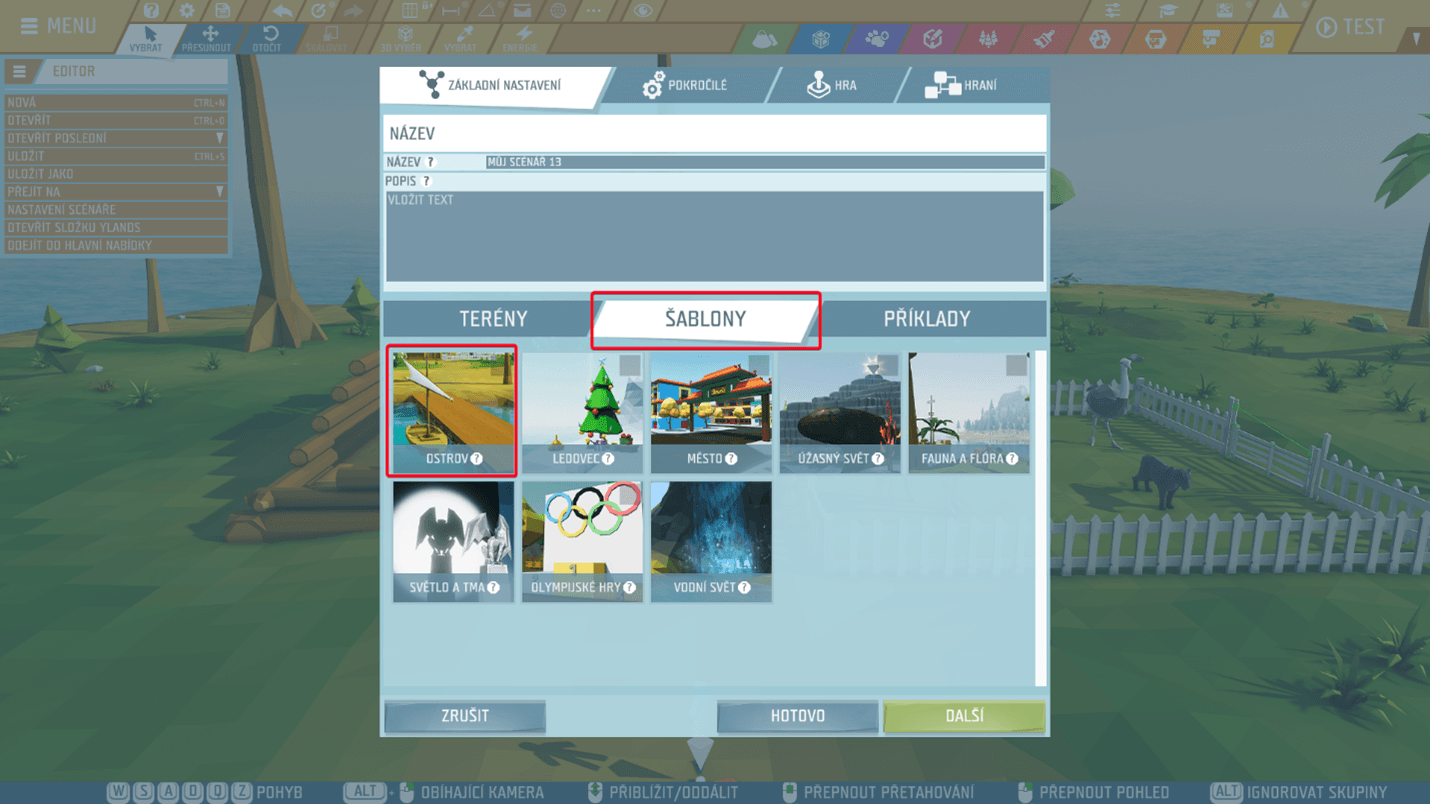
To get straight to scripting, we will use the ready-made Island template. Create a new scene in the Editor and during setup choose:
- the Templates tab,
- the Island scene.
⚠️ WARNING
You will also find the name Island in the Terrains tab, but it is a different scene. For this chapter, always use Island in the Templates section.
💡 TIP
Visual scripting works in any scene—not only in this template. We use Island only because it already contains a ready environment for experimenting.
After opening the scene, you will see a partly built house, a pen, and a few animals. Feel free to adjust the scene, but for our first scripts, this setup is already enough.
Scripting canvas
Every object in the scene (or a group of objects) can have its own script. A script is a set of commands that tells what should happen—for example:
- “when X happens, do Y”,
- “when entering an area, turn on a light”,
- “when opening a door, change an object’s color”.
Instead of theory, let’s add our first script right away.
In the scene, select the door of the house. On the left side in the properties panel, you will find the Add script button. Click it to open the scripting canvas for this door.
ℹ️ INFORMATION
If the Add script button is greyed out, the object is probably a regular building block. To attach a script to it, enable Unique in the properties.
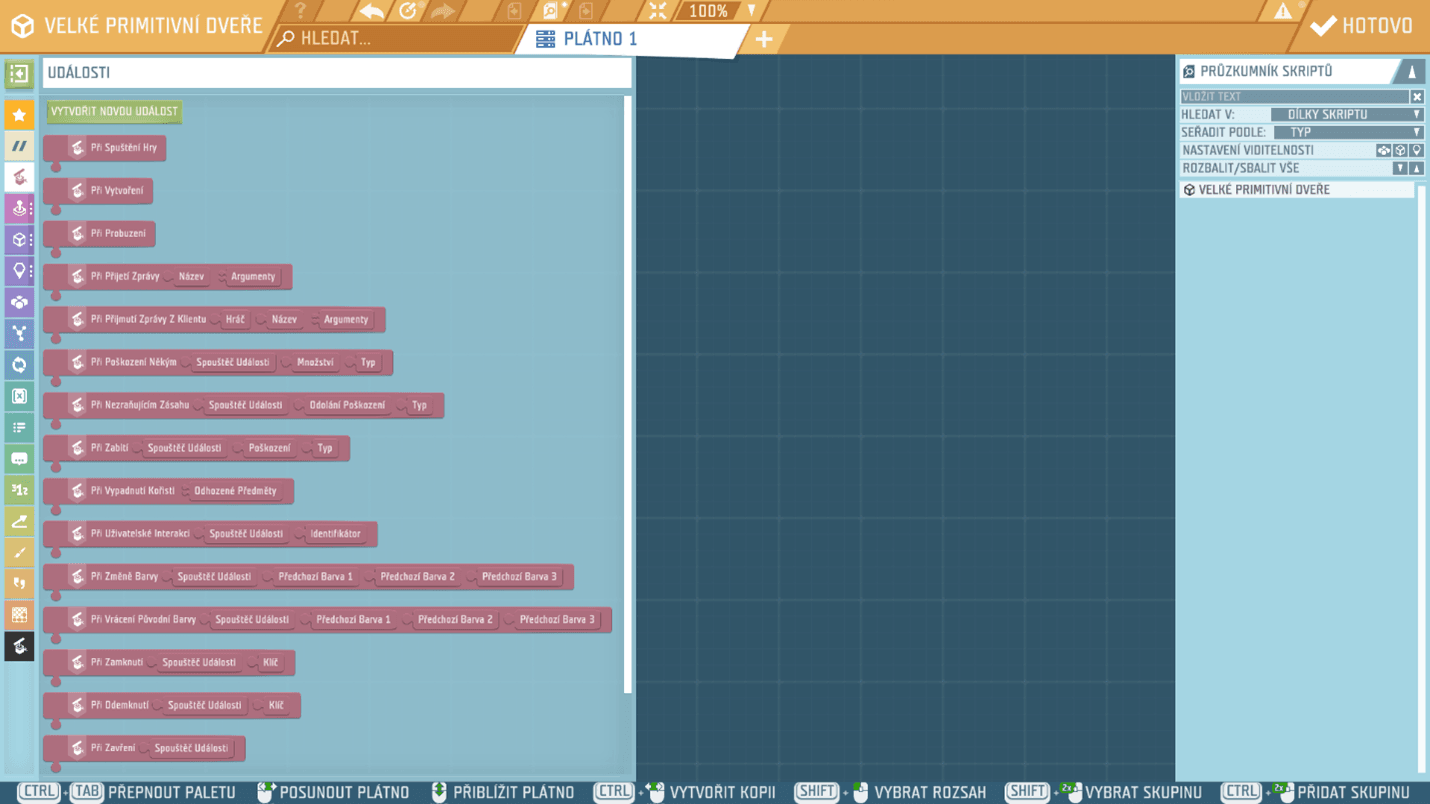
This opens the so-called Scripting canvas. You can think of it as a workbench where we will place and connect individual script “tiles”.

💡 TIP
One object can have multiple scripting canvases. In more complex scenes, you can split the logic into clearer parts.
On the scripting canvas, you will see:
- left – command categories (e.g., text, numbers, entities, events…)
- center – the canvas itself, where you place and connect tiles
- right – the Script Explorer panel, where you can see an overview of all canvases and scripts (open it with the documents + magnifier icon).
Working with scripting tiles
Scripting tiles work like building blocks:
- add a tile by dragging it with the left mouse button from the menu onto the canvas,
- tiles can be moved and connected—their shapes show where they fit,
- delete a tile by selecting it and pressing Delete (Del).
💡 TIP
At the bottom of the window you will see a hint bar with keyboard shortcuts for working with tiles. Try them even if you don’t need them yet—they will help later with more complex scripts.
Events and their role
For a script to do something, something has to happen—for example:
- the player starts the scene,
- opens a door,
- enters an area,
- a certain amount of time passes.
We call these triggers Events. You can find them under the fourth icon from the left in the scripting tiles menu.
Events don’t execute anything by themselves—they only say: “Now start running the connected commands.”
Examples of events:
- On Game Start – triggers when the player starts the scene.
- On Wake Up – triggers when an object is “activated” in the scene.
- On Open / On Lock – typical door events that react to door behavior.
Different objects can have different special events depending on what they can do. Doors have different events than, for example, a lever, a button, or an animal.
On doors, you will find for example the On Open event. When the player opens the door, this event activates and runs all commands connected to it.

In this example, after opening the door, its color changes to green first and then the game time is set to six in the evening.

This is the absolute foundation of visual scripting: an Event triggers the commands connected below it.
⚠️ WARNING
A command that is not connected to any event (or to another command connected to an event) will never run. It is not enough to just place it on the canvas—it must be part of a chain that starts with an event.
Creating your first script
Let’s create a simple but practical script:
Goal: the house door opens automatically when the player gets close.
We will use Game Logic – Activation Area. It can detect when the player enters a specific place.
- place the Activation Area in front of the door,
- set its shape and size so the player must pass through it when approaching the door.

Now open the scripting canvas of the Activation Area (same as with the door – the Add script button).
Steps:
- in the Events category, find On Enter Area and drag it onto the canvas,
- in Entities → Actions, select Open and add it to the canvas as well,
- snap the Open tile under the On Enter Area event,
- on the Open tile, click the “eyedropper” button and select the door in the scene that should open.
💡 TIP
Want to see the Activation Area even after starting the game? In the area properties, enable Visible. For finished games, you will usually keep it hidden.
Don’t be afraid to experiment
Even this simple script can be a great base for more ideas. Try to:
- use the On Exit Area event and automatically close the door when the player leaves,
- create multiple activation areas – each can trigger a different action,
- change the weather or time of day when the player enters a certain area.
Visual scripting is the perfect space for trying and discovering. If something doesn’t work out, just tweak the script and try again.
Useful commands
🔥 COMMANDS
- Set Weather Everywhere – quickly changes the weather in the scene.
- Set Game Time – shifts the time in the scene (e.g., to evening).
- Show Bubble – shows a text bubble above a character.
- Show Notification – displays a short message on the player’s screen.
- Open / Close – actions for doors, gates, and other objects.
- Ignite / Extinguish – useful for torches, fires, and light-emitting objects.
- Play 2D Sound – plays a sound regardless of the player’s position (e.g., a short effect).
- Play 2D Tone – plays a simple tone (for example for signaling).
💡 TIP
Looking for a specific command? Use search in the tiles list with CTRL + F and type part of the command name.